I am so bad about posting my work on the blog, but my goal is to do more of it next year! I will do a round-up of family photos at the end of the season, but for now, I wanted to share some photos I took on Sunday of one of my nearest-and-dearest friends, Amanda. We are so in love with her sweet daughter, Charlotte, already! I’m anxious to meet her. Amanda has always been so tiny and petite, and fortunately for her, this carried over into her pregnancy. Hello, hot mama-to-be! Scott is one lucky man. Amanda didn’t want to take photos, but I convinced her to come over and snap a couple in an empty lot directly across from our house. It took five minutes ,and she already thanked me for talking her into it. I mean, how could I not document how stunning she looks!
I recently started working with Caroline Harper Knapp, the blogger behind House of Harper (which, if you don’t read, you should!), and last Tuesday, we had plans to meet up for regular fashion photos, but we decided last minute to take maternity photos instead. Caroline was 35 weeks pregnant at the time, and she delivered her son, Knox, at 34 weeks, so baby boy Knapp was already behind his older brother. Mother’s intuition should never be second guessed, as she ended up delivering her babe, Andrew Nolty, the very next day. I took his newborn photos today, and he is such a doll! I cannot wait to share more photos.
Caroline is seriously stunning, and I love the sweet moments captured of her and her equally good looking son, Knox. I didn’t have maternity photos taken, but will definitely consider it when we get pregnant with baby number two. Here are some of my favorite photos from the session!
I seriously, seriously love floral crowns. They are perfect for weddings, wedding showers, maternity shoots, baby showers, newborn photos or just because! I have made suggestions on outfits with which you can style a beautiful floral crown at the bottom of this post.
Ever since I started my Floral Arranging 101 class, I’ve been motivated to create my own. I have read a number of DIYs (like this, this and this), and decided to give it a try! At first, I thought about doing a little one for Isla (she’s already worn this one in her newborn photos), but decided to do an adult-sized one and I’m so glad I did! I will admit that this DIY is perhaps not the most technical (as I use a hot glue gun, which would make many florists cringe!), but it works! Read the process below:
I went to the grocery store and picked up some cremones and carnations. Then I went to my front yard and cut down some foliage for fillers – you can also find these in the floral department of your local grocery store.
I cut all of the flowers so that they had 2-3 inch stems and then laid everything out on the island and placed it in the order I wanted for the crown.
I took an 18 gauge floral wire and bent one end about half an inch from the end and thread one of the carnations through – it is important to use a thick stem flower versus a piece of foliage at the end.
I then began to add the flowers and foliage by wrapping floral tape around the base and the floral gauge – laying the pieces along the length of the wire. When I got to a carnation or a cremone, I would take the wire through the stem of the flower versus the side layering technique.
Tip: As mentioned earlier, I also used a hot glue gun to secure some of the floral tape to the wire, and in some instances, to glue the bushy leaves to the wire.
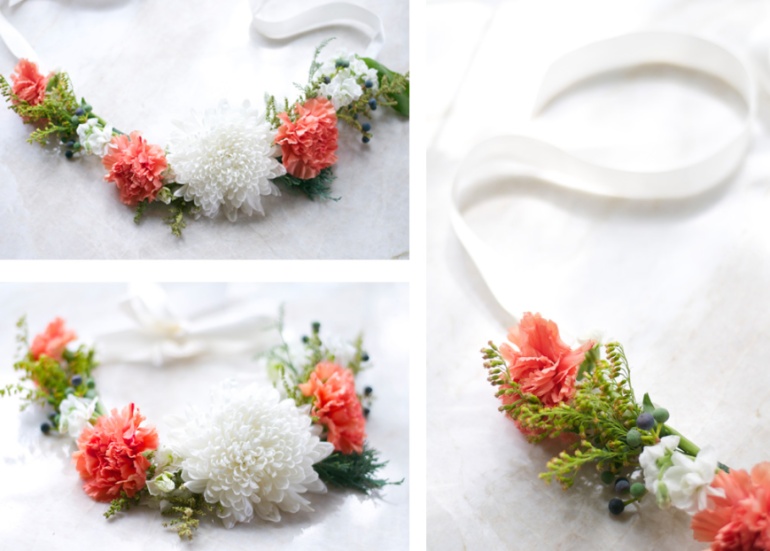
When I finished filling the floral wire with flowers, I cut two pieces of cream ribbon 7 inches in length. Put a dot of hot glue on one end of each strand of ribbon and secure it to the end of the wire. Once the glue is dried, you can put it on your head and tie a bow at the back!
You can extend the life of your crown significantly by storing it in a drawer in your refrigerator. Mine lasted four days, then some of the flowers started to wither. Make sure you start the process with the freshest florals you can find.
Arrange all flowers in the order you’d like them on the crown, then thread them through the floral wire (steps 3-5 above)
Add the ribbon to the ends and tie, then voilà… a beautiful floral crown!